At CarnivoreWeb.com, we independently review products and outfitters. However, we may earn a commission when you purchase products through links on our site. Read our affiliate policy. Read about how we test products.
When it comes to skull mounts, European isn’t always a dirty word.
European mounts, skull mounts, western mounts … all mean the same thing. We’re preserving a reminder of a successful hunt that can be enjoyed long after the last morsel of protein has disappeared from the freezer. To achieve this, we’ll remove the hide, muscle, and flesh particles, resulting in a clean skull with nothing but antlers or horns attached, depending on the animal.
Why a Euro Mount?
There are many reasons people opt for a skull mount. One is to save space when hanging. Since there’s no neck or hide, it increases your mounting options. Another is aesthetics; some folks may feel the skull to be more artistic. And some may not want to spend the money on a full shoulder mount, which run in the thousands of dollars. Let’s face it, not every animal is worthy of a full-blown shoulder mount, but that doesn’t mean that the skull and antlers should be thrown out.
You don’t need a professional to do this. Let’s run through a process using boiling that’ll achieve professional results and prepare you for your first DIY skull mount. There’s another tactic usually reserved for full-time taxidermists using dermestid beetles, which we won’t cover.
Like recipes, processes, and tools, everyone has their preferences. Talk to anyone who’s done a skull mount, and you’ll get different advice. That’s OK; this is one way, learned through trials and tribulations, that consistently produces good results. We define a good result as a clean white skull and natural-looking antlers. It’s not a difficult task, but it’s time consuming. If this is your first time, don’t try this on your trophy elk. Perhaps give it a try on that doe you shot for meat.
There are a few key points to remember that hold true among various techniques. Straight bleach can yellow your skull, so don’t use regular disinfecting bleach found at your home improvement store. Don’t overboil, as it can over harden and crack the skull. Get as much tissue cleaned off as possible before beginning and in-between boils.
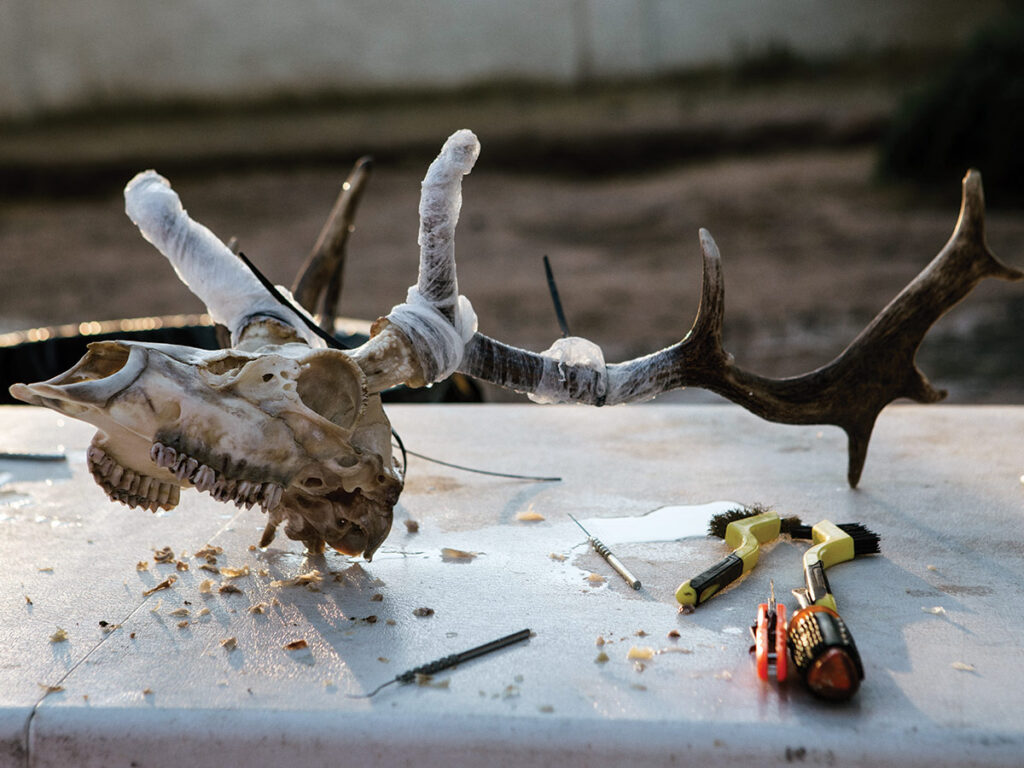
Collect Your Supplies
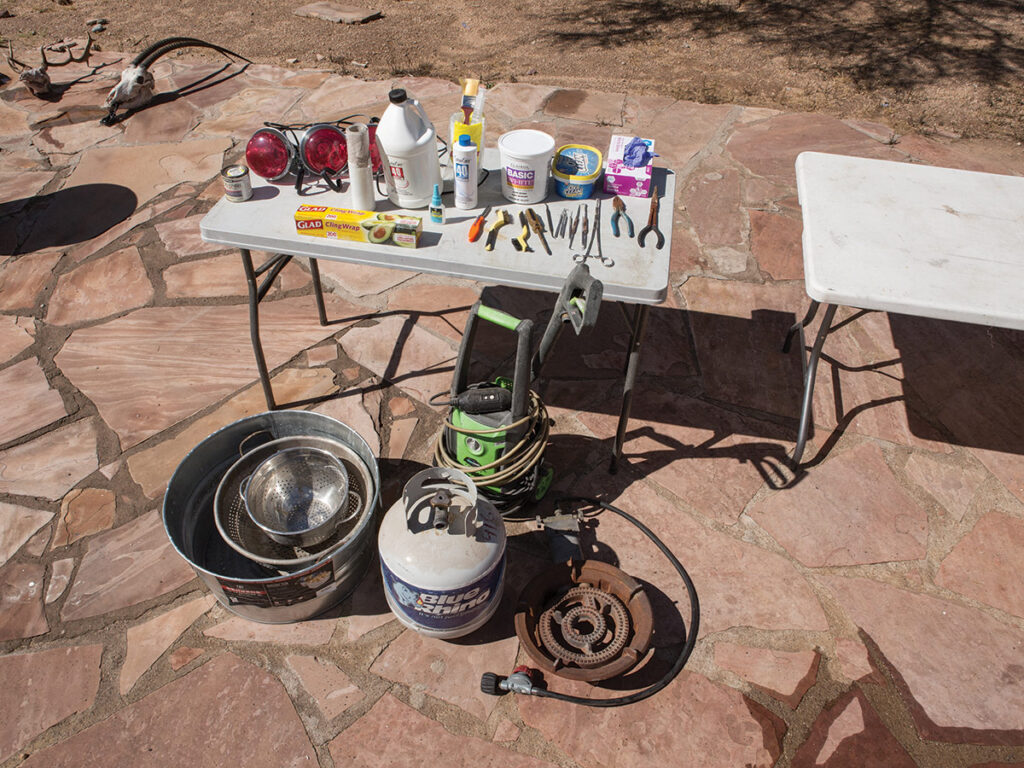
This will require a small investment, but most tools can be acquired inexpensively from discount tool stores if you don’t already have them. You won’t need high-end brand-name tools.
- Large propane burner with pot big enough to submerge your skull
- Salon-grade bleach/whitener (powder, liquid, and cream)
- OxiClean
- Long forceps (for pulling things out of hard-to-reach places)
- Various picks for cleaning and pulling
- Cling wrap (for protecting antlers during boils)
- Cheap paint brush
- Syringe
- Paper towels
- Heat lamp
- Clear superglue
- Pressure washer (optional, but at a minimum a high-powered hose nozzle)
- Strainer (optional, but if you lose any teeth it’s helpful to have when dumping water)
Prep the Skull
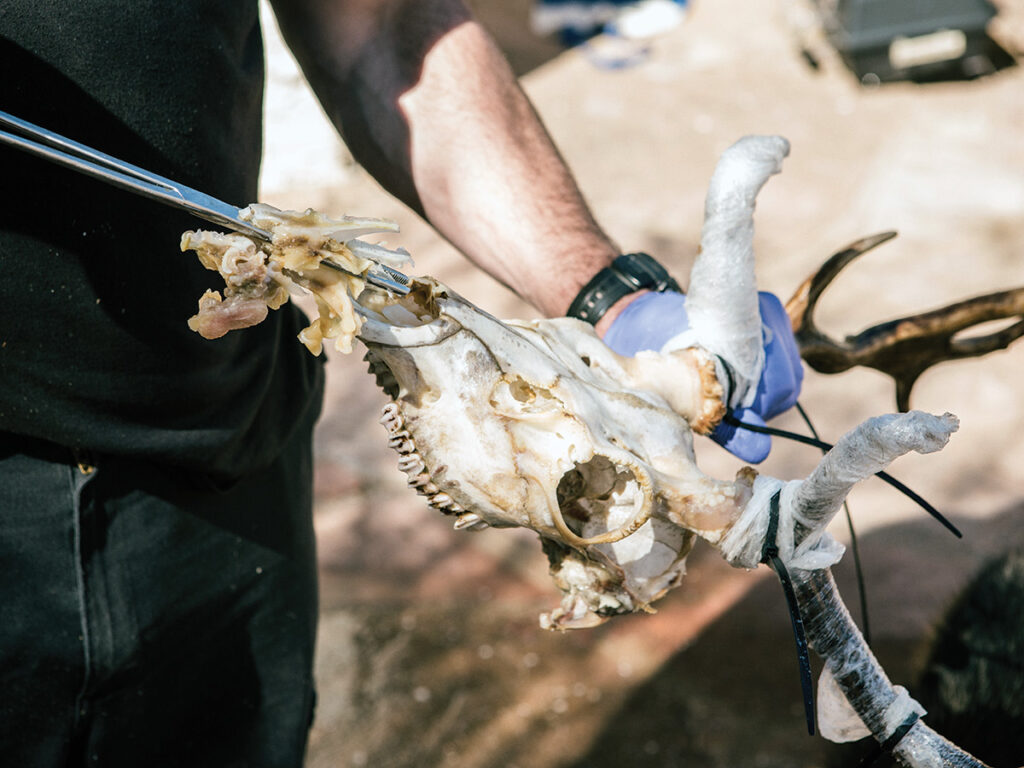
Assuming the head of your animal is already removed from the carcass, use your knife to cut away the entire hide from the skull. Remove the eyeballs, jawbone, and as much connective tissue and muscle as you can. Most skull mounts are done without the lower jaw, but if you’re planning a tabletop display, they sure do look cool with the jawbone. Regardless, remove the jaw and put it in the water with the skull if you’re going to keep it. The jaw will split, but it can easily be glued back together.
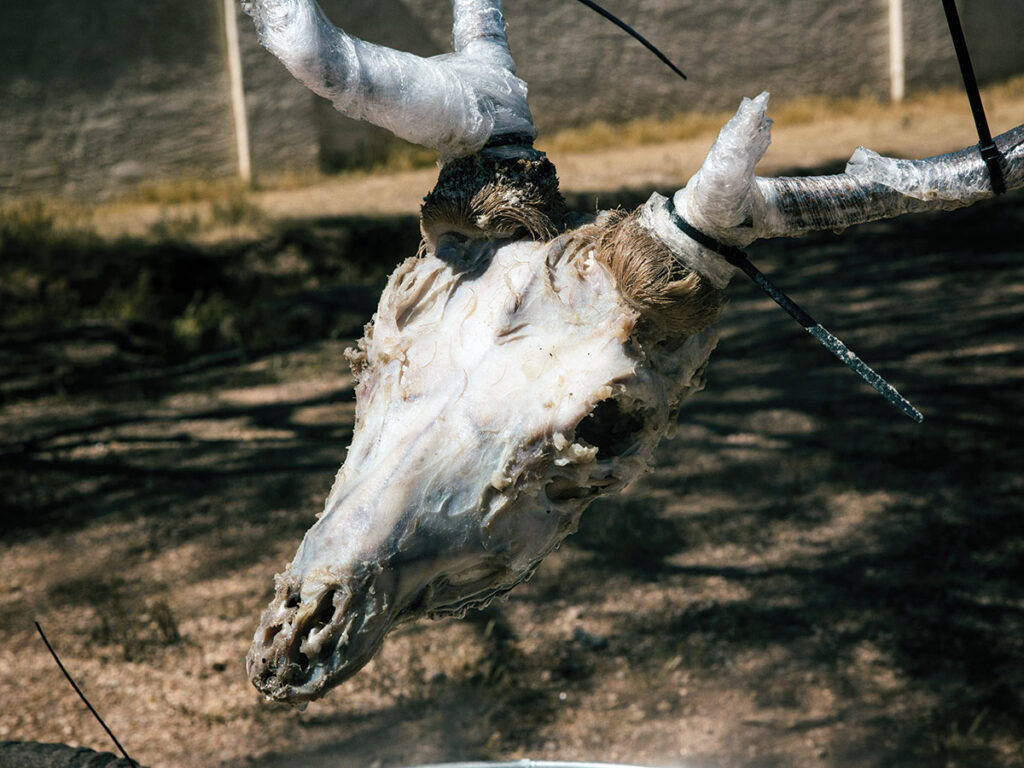
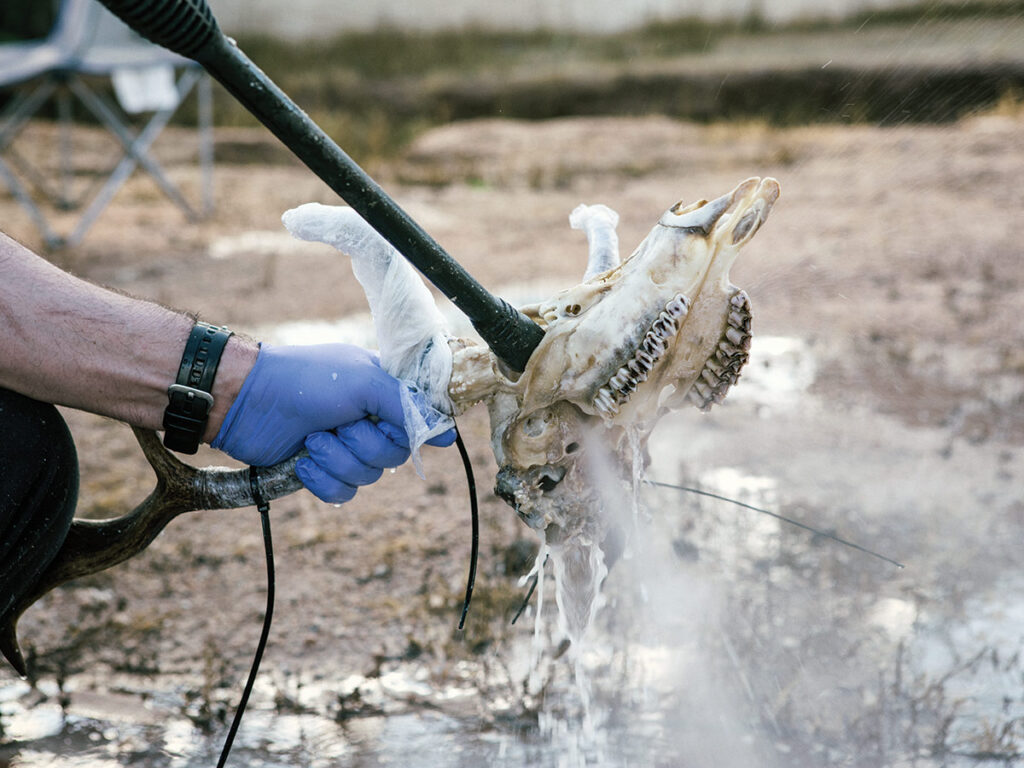
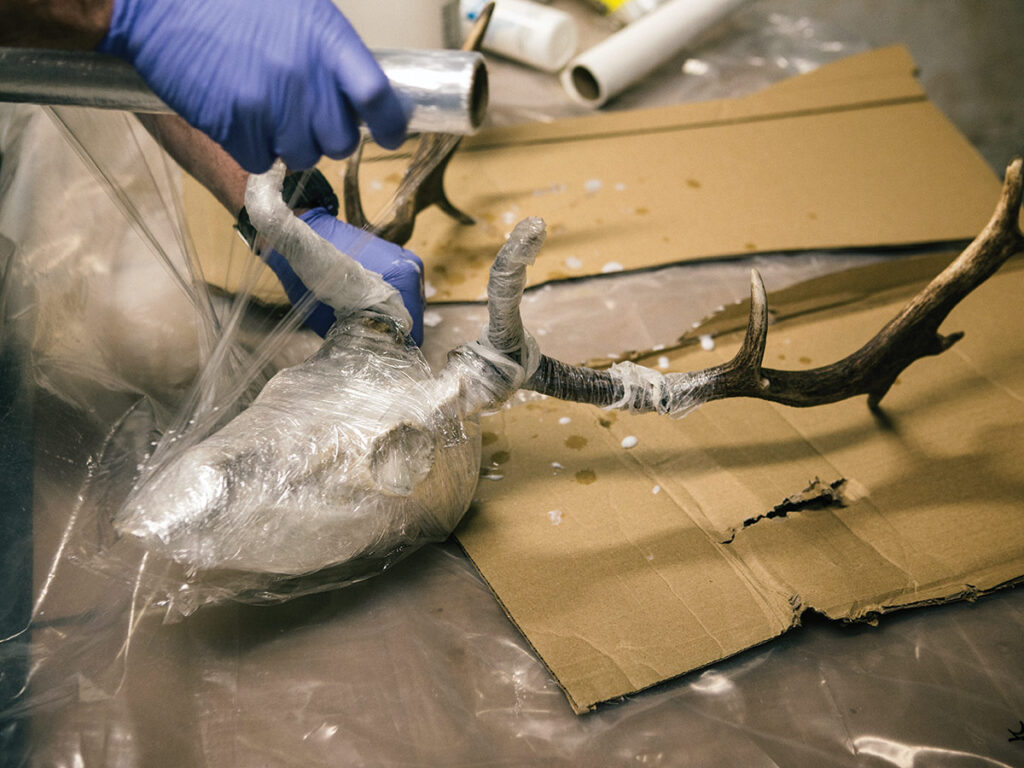
Protect the antlers as much as you can from the bleach-infused water. No matter how hard you try, you’ll probably end up with an inch or so of the antlers inadvertently submerged. Use your cling wrap to protect the bottom third — because water will penetrate under the wrap, seal up the bottom as best as you can. There are water-resistant tapes that’ll work; just don’t use one that leaves residue behind. We used cable ties this time, which worked great.
Get the Water Going
Fill your pot with enough water to submerge the skull entirely. You don’t want the water rising too high on the antlers even though they’re protected. Keep in mind that as water boils it evaporates, so you may need to add more throughout the process.
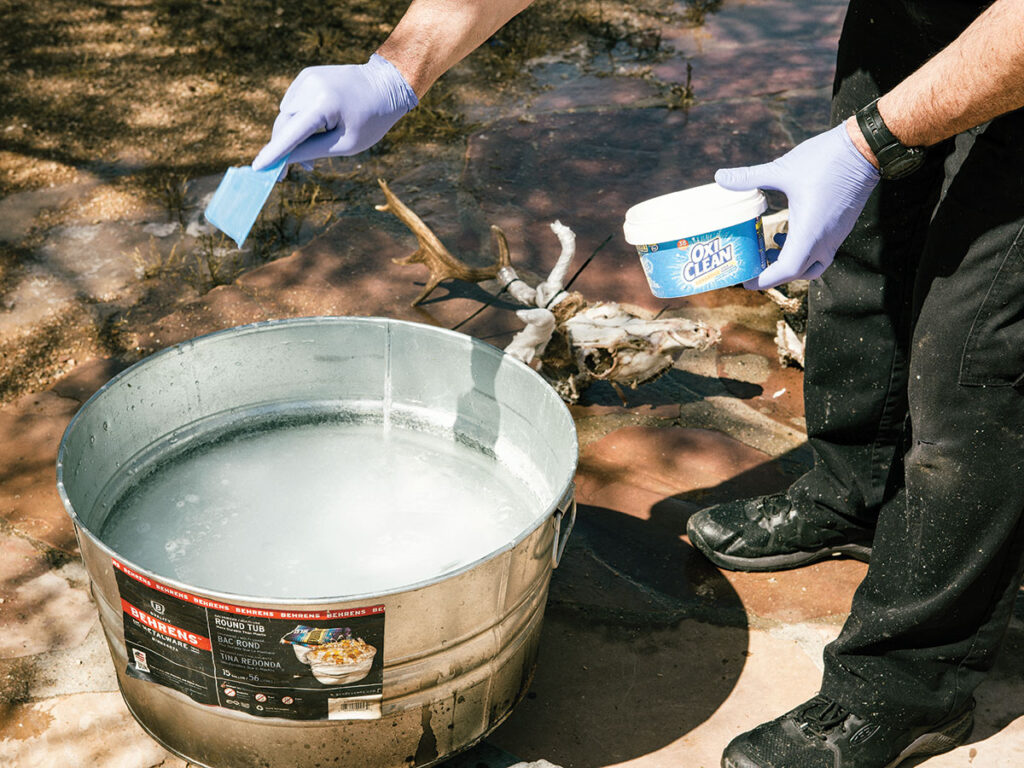
Add 4 to 6 scoops of OxiClean. The amount depends on the size of your pot and size of skull you’re doing. You needn’t be too precise; just add a handful of scoops. The OxiClean at this stage simply aids in degreasing the skull.
Light your burner and place your pot on it. It’ll take some time to bring it to a boil. Use the time to pick at your skull some more, or just sit back and have a beer. You don’t want a hard boil, just a soft rolling boil.
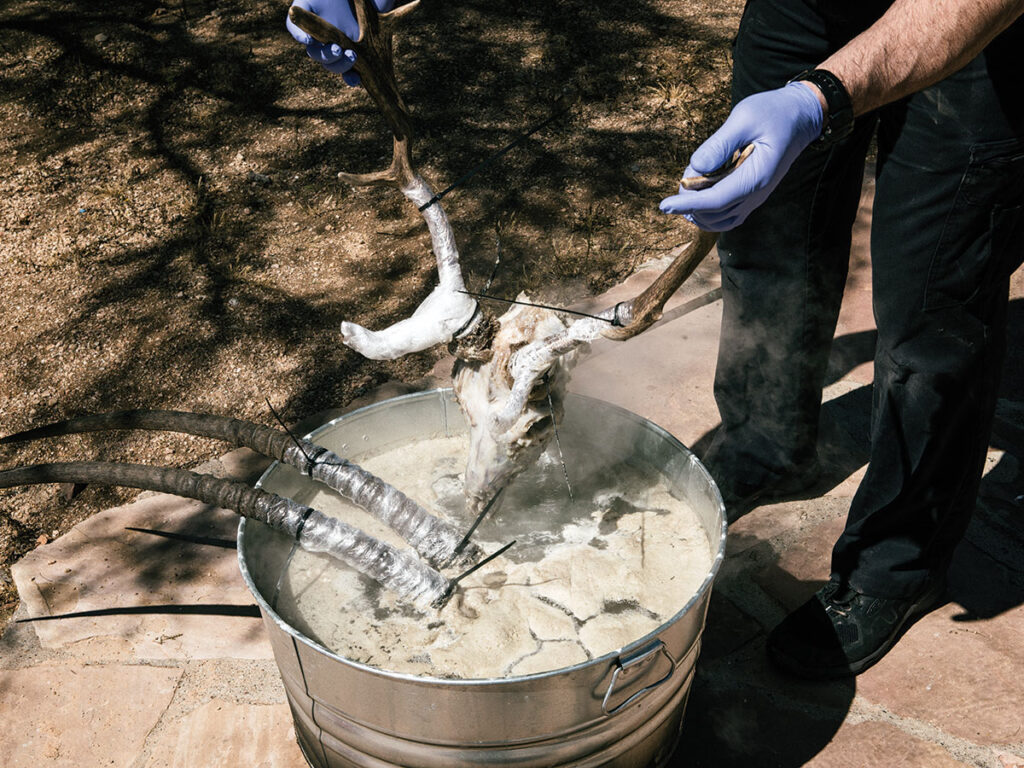
Time to Get it Wet and Clean
Once you’ve reached a soft boil, lower the skull into the water, while keeping the antlers out and dry as best as you can. If they’re exposed to whitening agents, they’ll discolor. Add the jawbone, if you’re processing it too.
For the first boil, give it about 20 minutes or so before removing the skull from the pot. There’s no magic number here; you won’t ruin anything by pulling it out early. Don’t forget your jawbone, using forceps or tongs to grab it out of the boiling water.
Use your pressure washer or high-pressure hose nozzle to spray the skull. Try to remove any large particles, tissue, and meat. Cut off any stubborn pieces with your knife. Don’t be afraid to use your picks at this stage. Get it as clean as you can, dip it back in the water if you need to, and repeat the process.
Sooner or later, you’ll need to clear the nasal cavity and remove the brain. Your forceps to the rescue! Reach, pull, and pick to get everything out. The brain can be pulled out from the back of the skull, and after boiling it should be relatively easy. Be as picky as you want. You may notice the top of the nose plate or the teeth becoming loose or falling out. This is fine; just don’t lose them — a strainer can help with this. You can easily glue them back in with clear superglue at the end. If you like, you can pop off the ear bone with a flat head screwdriver.
Your water will be pretty filthy by now. Empty it, and get a fresh pot going again. This time, add the powdered lightener (salon-grade powdered bleach). Add enough to cover the top of the water and mix it in, then bring it back to a soft boil. This will provide some finishing cleaning touches as well as begin the whitening process.
Put the skull back in the water again, removing it periodically to pressure wash and pick off stubborn tissue. Repeat as necessary. You can spend minutes or hours doing this. Get the skull as clean as possible, aiming to remove 99 percent of the gunk before moving to the final whitening step.
Whiten Up
Once you’re done with the boiling, your skull should be pretty clean, but only somewhat white. Don’t worry if it’s not as white as you think it should be; that comes next. Make sure your skull is dry. Leave it out overnight or use light air from your compressor.
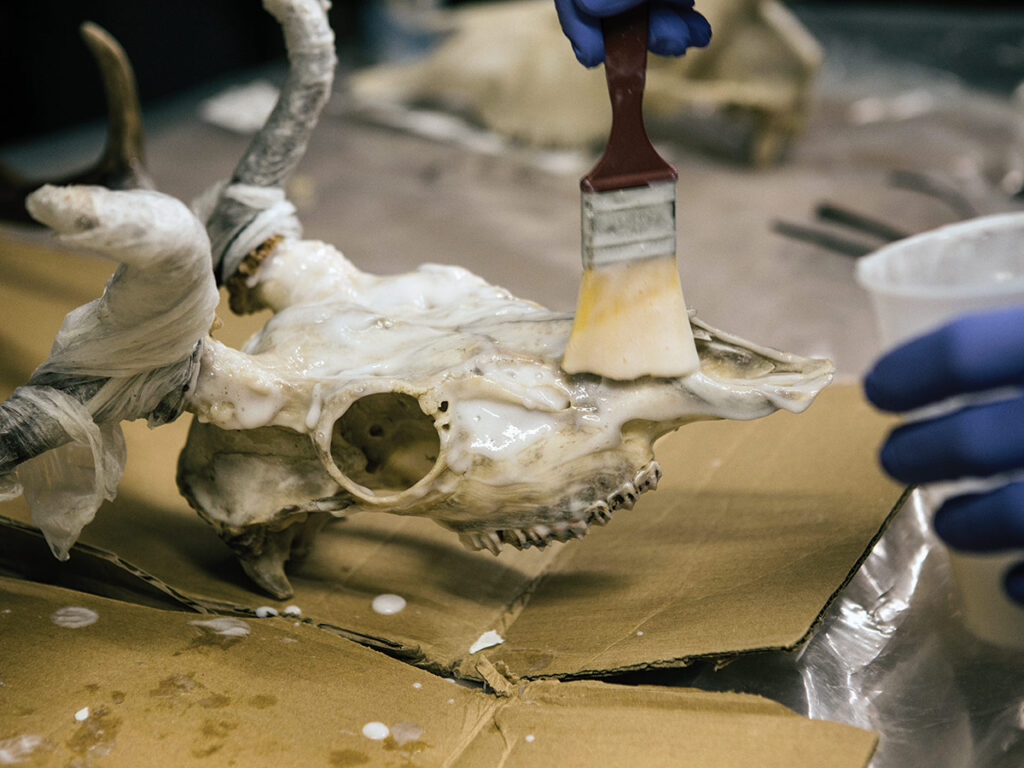
Mix your powdered whitener with the cream whitener to create a paste, about the consistency of mayonnaise. Wear gloves and lay down plastic or cardboard, as this can get rather messy. Use your brush to spread the paste over the entire skull and every possible nook.
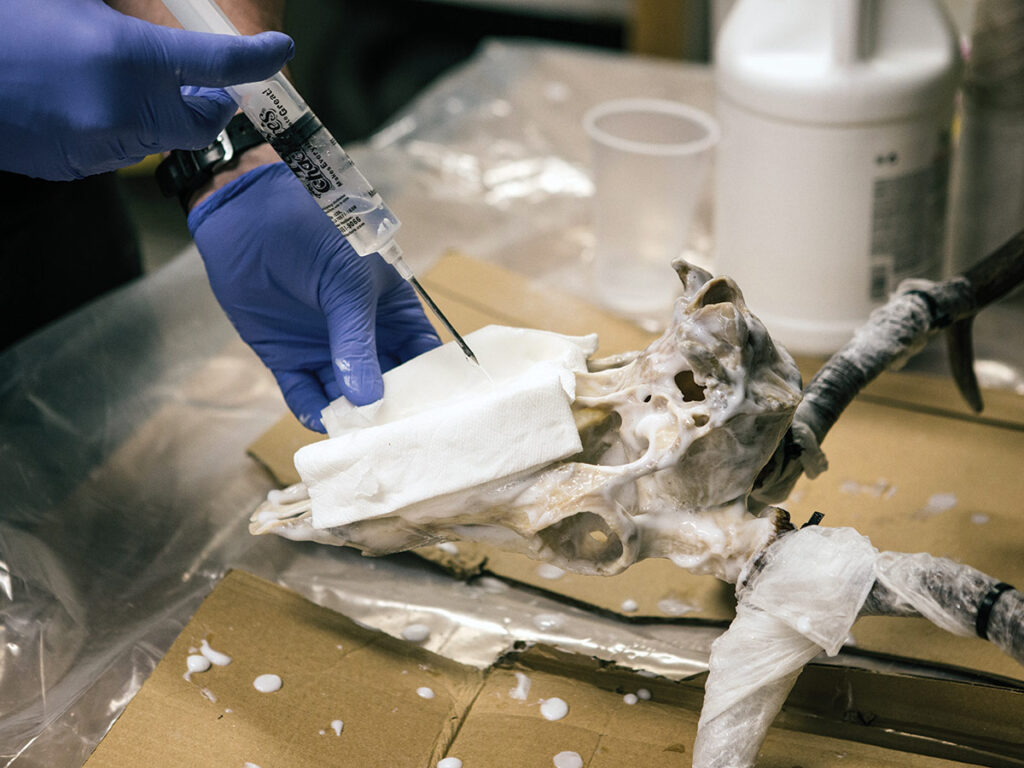
Wad up paper towels and shove them into the eye sockets, the nasal cavity, and brain cavity. Fold and wrap paper towels around the teeth. Using a syringe similar to those used with injectable marinades, soak the paper towels with liquid whitener.
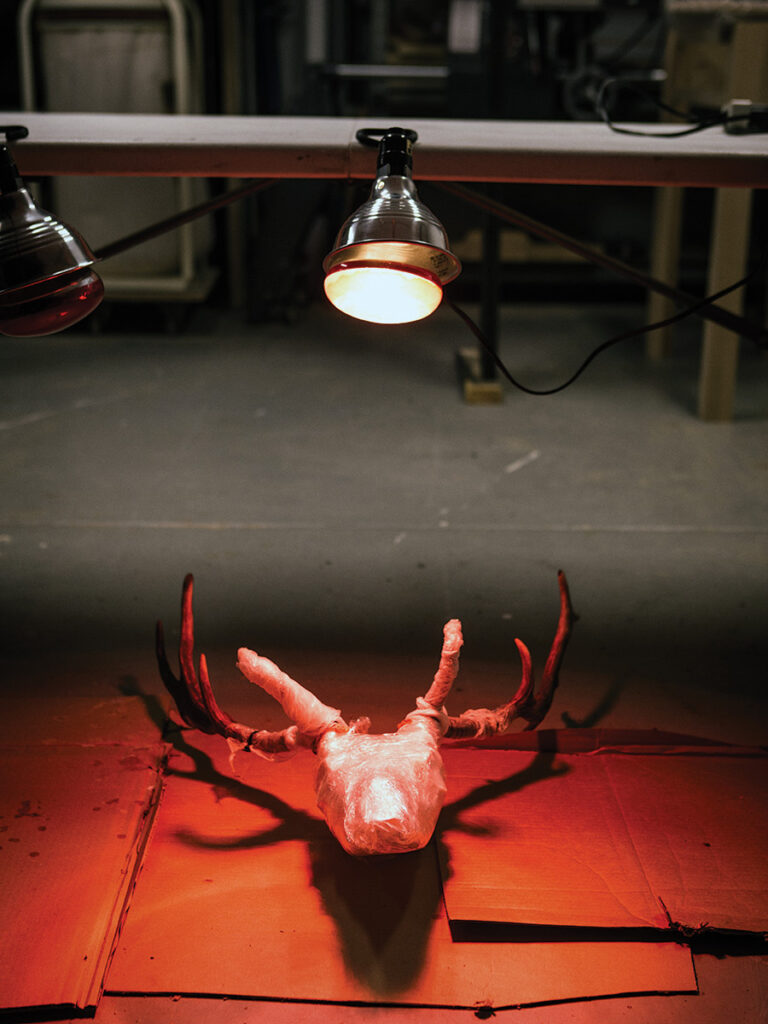
Next, wrap the entire skull in paper towels, then wet them with the liquid whitener. Wrap the skull with plastic cling wrap, sealing in the paste. Set your skull under a heat lamp or two. Heat activates the whitener, so leave it for 4 to 8 hours under the heat lamp. Place it about two feet away; don’t get the heat lamp too close as it can burn and discolor your skull.
Finally, unwrap your skull, remove all of the paper towels, and rinse it thoroughly. You’ll immediately see how much whiter your skull has become, allaying any doubts that you had thus far. Unwrap the antlers after rinsing, and leave the skull in the sun for a few more hours. It’s amazing to see how the skull whitens even further under the sun.
If you have any stubborn tissue left on the skull or grass in the teeth, use your picks to remove as much as you want. Once your skull is dry, glue any loose bones or teeth back together using clear superglue.
If the base of your antlers whitened in areas from the boiling and bleaching process, use an appropriate colored wood stain to touch them up. It takes a while to dry but works remarkably well. Lastly, you can apply a clear coat over the skull for further protection in any finish you wish.
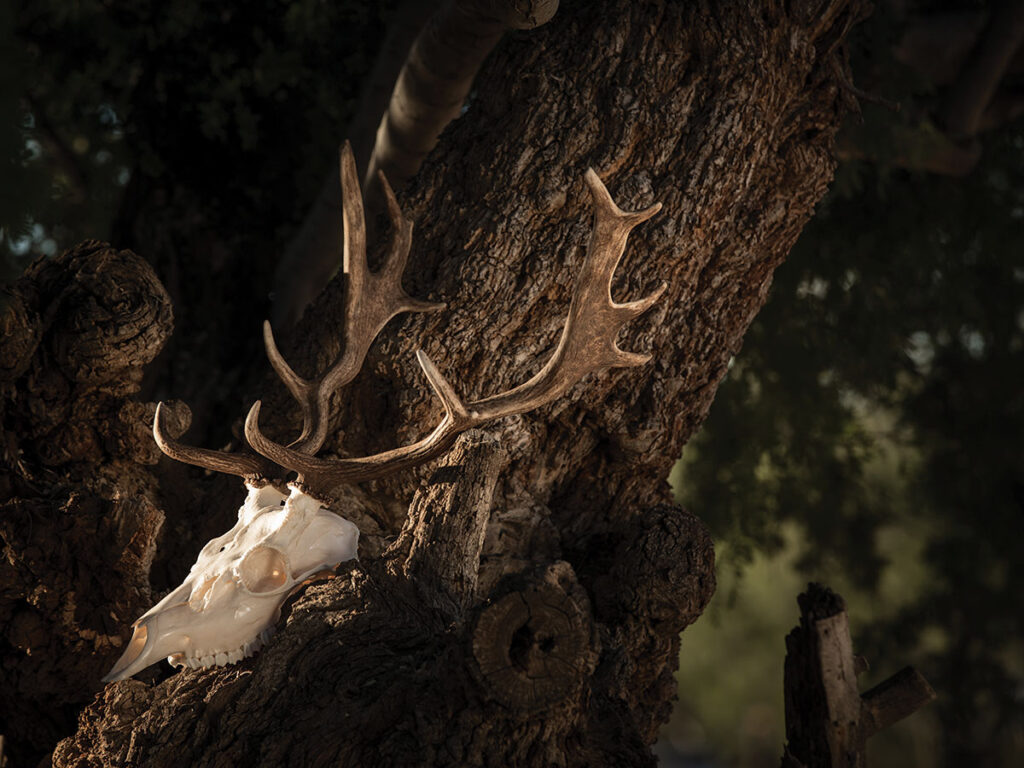
Skull mounts have a unique and stylish look. While they may not be for everyone, and you may not opt for it on your bull of a lifetime, skull mounts look great, can be done at home with a little time and effort, and will bring back fond memories of your hunt.
Editor’s Note: This article originally appeared in Carnivore Magazine Issue 4.
Why You Can Trust CARNIVORE
Since its launch, CarnivoreWeb.com has been a trusted authority on hunting, fishing and wild food, delivering expert insight for outdoorsmen who live the field-to-table lifestyle. More than a hunting and fishing site, CarnivoreWeb.com covers the full spectrum of the modern outdoors—from rifles, bows, and fishing gear to cooking, conservation and adventure.
Our contributors are drawn from across the hunting and angling world, including seasoned guides, lifelong hunters, competitive shooters and outdoor writers with decades of field experience. Every review, article and feature is built on firsthand testing, deep research, and an unwavering commitment to accuracy.
Commitment to Journalistic Principles
At CarnivoreWeb.com, upholding journalistic integrity is our top priority. We follow strict editorial standards to ensure all content is accurate, transparent, and unbiased. Our editors and writers operate independently, free from outside influence, advertisers or stakeholders. We adhere to established journalistic codes of ethics, holding ourselves accountable for the information we publish, correcting errors when they occur and disclosing any potential conflicts of interest.
This commitment ensures that our readers can trust CarnivoreWeb.com to provide reliable, honest coverage that helps them make informed decisions—whether selecting gear, honing outdoor skills or preparing wild game.
Find out more about our Editorial Standards and Evaluation Process